GIFs can be used in conjunction with Page Designs in two ways: As multiple still frames from your GIF populated in a Page Design/Photo Strip for sharing and printing, or your GIF can play as an animated GIF within a Page Design. This tutorial will cover how to set up PBU for either of these options.
Save GIF frames to a Page Design
To save GIF frames in a Page Design we need to first have a Page Design you would like to use. You can either create your own (see how to set up a Page Design HERE) or use one of our default Page Designs included with PBU. If you don't see our defaults, hit Restore Generic Settings in the Preferences tab.
2.
Once you have a Page Design created (or have picked out a default one to use), navigate to the GIF tab and select Make New GIF or choose a previously made GIF from the thumbnails at the bottom of the screen by double clicking on it.
3.
4.
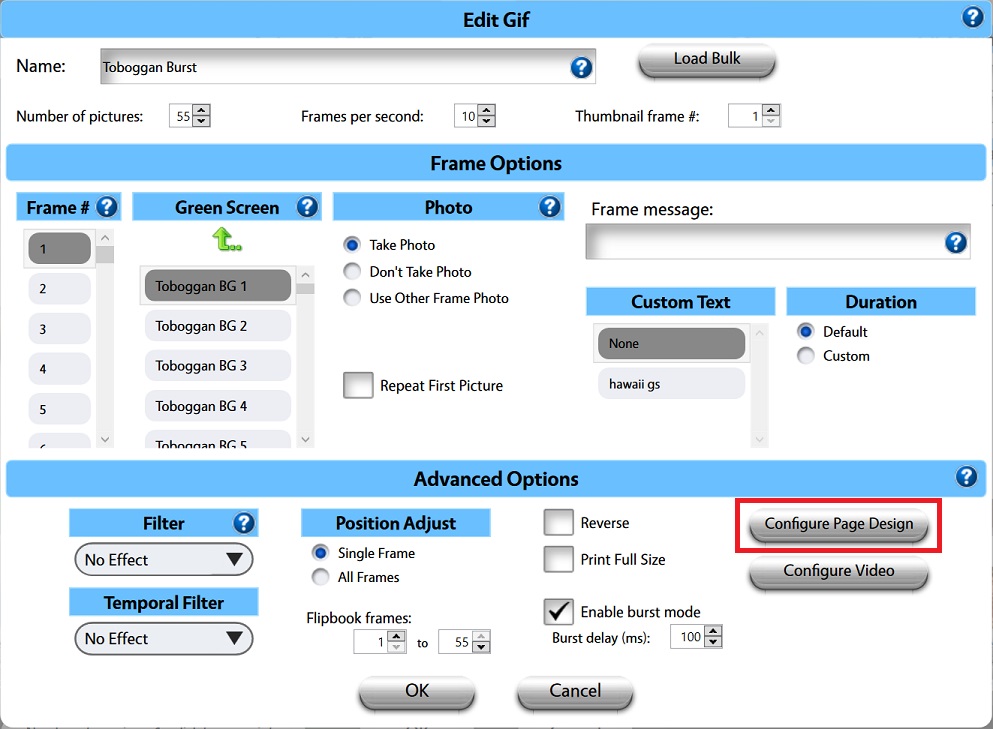
After selecting Configure Page Design, a window will appear with the option to Save GIF Frames in page design. Check this box and the following options will appear:

Page Layout: Displays all the Page Designs currently available in the Page Design tab
Place Holder #: Displays how many photo holders are available for the associated Page Layout. Click to select each placeholder. Once selected, you may assign which GIF frame will appear in that holder.
GIF Frame #: Displays the number of frames for the Gif that is currently being edited. Select a GIF frame from this list to assign it to the Place Holder that is currently selected in the "Place holder #" list.
Use custom green screen: Enables the ability to assign a specific green screen background to each GIF frame that is to be included in the Page Design.
Unselect All Green Screens: This button will remove all green screen selections from all GIF frames in the Page Design in one fell swoop.
Green Screen: All green screens available in your Green Screen tab will appear in this list. When a place holder has been selected, and a GIF frame has been assigned to that place holder, and the "Use custom green screen" box is checked, then you can select which green screen background/overlay should be applied to that GIF frame. Note that this must be done for each place holder individually.
Save Page: This will save both your regular GIF file AND the processed Page Layout to be seen by your guests in the Photo Party Upload Kiosk. If a guest chooses to print the GIF file from the kiosk, the frame # you chose in GIF settings will print, not the Page Design.
Save Page and Print: Saves the Page Design (as described above) and will print the Page Design when a guest tries to print the original GIF.
Print Only: Saves the Page Design image with print extension, so it doesn't show up in Photo Party Upload kiosk, but it gets printed if someone selects the GIF and prints it.
Use Original Photos: Places the original unprocessed photos in the placeholders of the page design.
5.
Choose the Page Design you wish to use from the Page Layout column on the left. In this instance, I choose the Wild West PG page layout. That Page Design has 2 photo holders on the design so 2 Place holder #s are available. With the first place holder selected, choose which GIF Frame # you would like to insert in that Photo Holder. Repeat the process, highlighting each Place Holder # available and associating them with GIF Frame #s.
6.
Once you have all the place holder #s associated with various GIF frames, click OK. You're now configured to have frames of your GIF appear in a Page Design. Continue below to learn how to have your GIF play within a Page Design.
Page Layout
You can also have your GIF play in a Page Design. This is useful as an alternative to adding an overlay to every green screen of your GIF, or to have multiple GIFs play simultaneously in one layout as one SUPER GIF!
After creating your GIF, return to the home GIF tab and notice the GIF Settings box on the right of the screen. Select Page Layout to reveal a drop down menu of all available Page Designs:

Select the Page Design from the drop down menu you'd like to use with your GIF. Once that is selected, you should see your GIF in its entirety applied to the photo holder(s) of the Page Design.
If your Page Design has multiple photo holders, PBU will make as many GIFs as necessary to fill each one. For example, If your Page Design has 3 photo holders and you have one GIF selected and set to Auto Apply, PBU will capture 3 of that one GIF and put them all in the Page Design. If you have multiple GIFs selected with User Select, you will still need to make as many GIFs as there are photo holders, but you will have the choice of which ones to make.
Please Note: If you select multiple GIFs for your Page Layout, each GIF must have the same number of frames.