This tutorial will show you how to take photos in front of a green screen (or any color) and replace the background with an image of your choice. You can also add overlays to give your images depth or to simply add branding.
Green Screen in PBU can be used with photos, Page Designer, GIFs, and Zoom-Scape. Video, Morph, and VR360 can also use Green Screen, but the controls for those Green Screens are in their respective tabs or edit windows. However, the controls are nearly identical.
Mastery of Green Screen is essential to make the most out of Photo Booth Upload.
1.
Navigate to the Green Screen tab in Photo Booth Upload by pressing S.
2.
Click the Green Screen tab and select the button that says Create New Green Screen.
3.
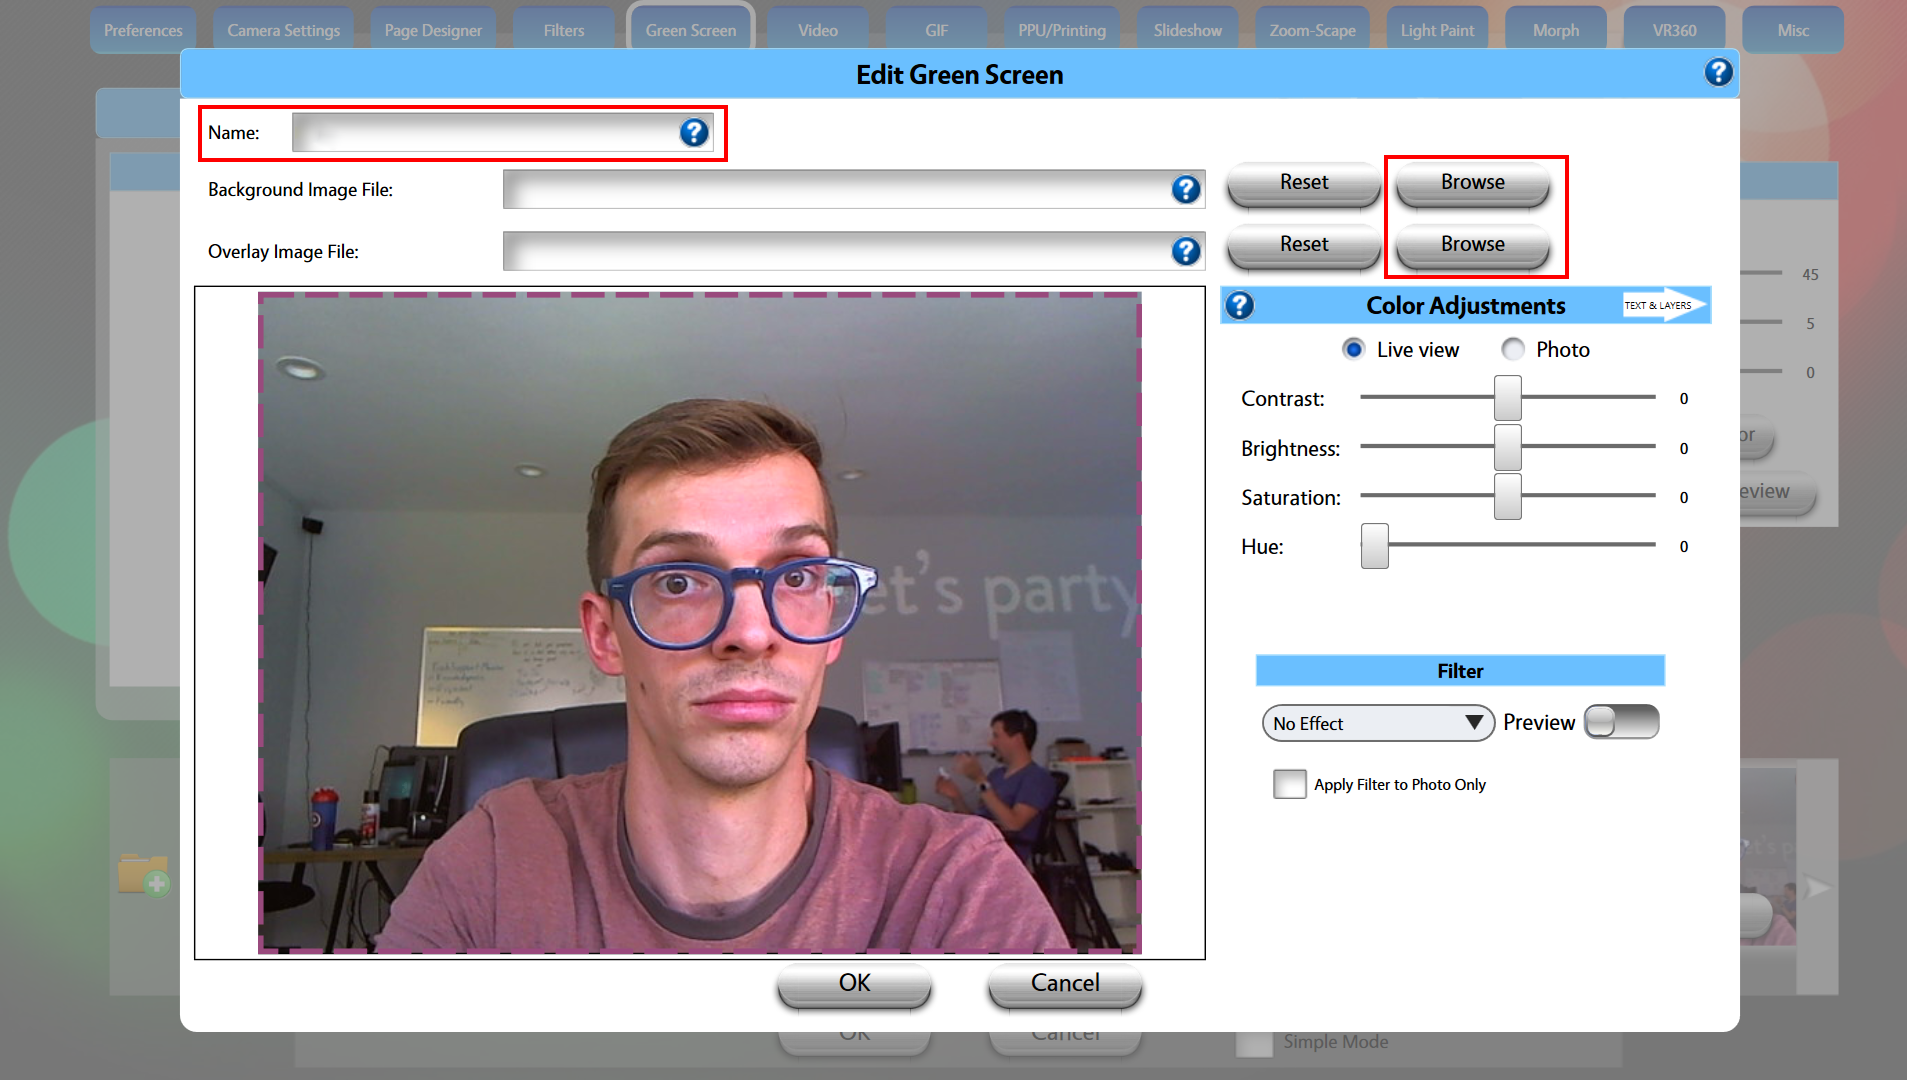
After selecting Create New Green Screen, you'll see a window appear like this with the following options.

Name: Enter a name for your Green Screen Project
Background Image File: Select an existing background image file to appear behind the guest by clicking the respective Browse button. This background should be in one of the following formats: BMP, PNG, JPG, JPEG, or GIF.
Overlay Image File: Select a PNG overlay image with transparency to appear in front of your guest's photos.
Color Adjustments: Color adjustments can be made for the Live View and Photo settings. Select the Live View or Photo button and Adjust the contrast, brightness, saturation, and hue to your preferences.
Filter: You can select and assign a specific filter to always be used with this particular green screen. Toggle the Preview slider to see a preview of the effect. The checkbox "Apply Filter to Photo Only" will make it so that only your guest's image has the filter applied, but the GS Background and/or Overlay will appear as usual. Otherwise, the entire image will have the filter applied.
4.
Enter a name for your Green Screen. Then upload your JPEG background and PNG overlay by clicking the Browse buttons.
Note: For 4x6 prints file sizes are typically 1800x1200 or 1200x1800.
5.
Place your photo holder to the desired location with your mouse. By default the photo holder will fill the entire frame. You can resize or rotate it by clicking and dragging the green circle.
Alternatively, you can use these keyboard shortcuts for fine adjustments:
- Arrow Keys to move the photo holder
- Z and X to rotate
- N and M to change size
- C or right-click to center the photo holder

6.
You can adjust the contrast, brightness, saturation, and hue in both the live view and the photo using the sliders on the right.

7.
Once you are satisfied with the photo holder placement and color adjustments, press OK to go back to the main green screen tab. If you want to apply the photo holder and color settings from one Green Screen to another, Right-click and select Copy Settings, then Right-Click and Paste Settings to apply them to another Green Screen. Or use Set All to apply them to every Green Screen in the folder.

8.
Technically, Green Screen is called Chromakey, as you can remove or "key out" any color, not just green. Green is most commonly used because it is the farthest color from human skin tone. Therefore, a green background makes it much easier for a computer to distinguish between the background and a person's face.
The Chromakey settings for PBU are on the right side of the main Green Screen window. Make sure to adjust for both the Live view and Photo, as these will not be the same.
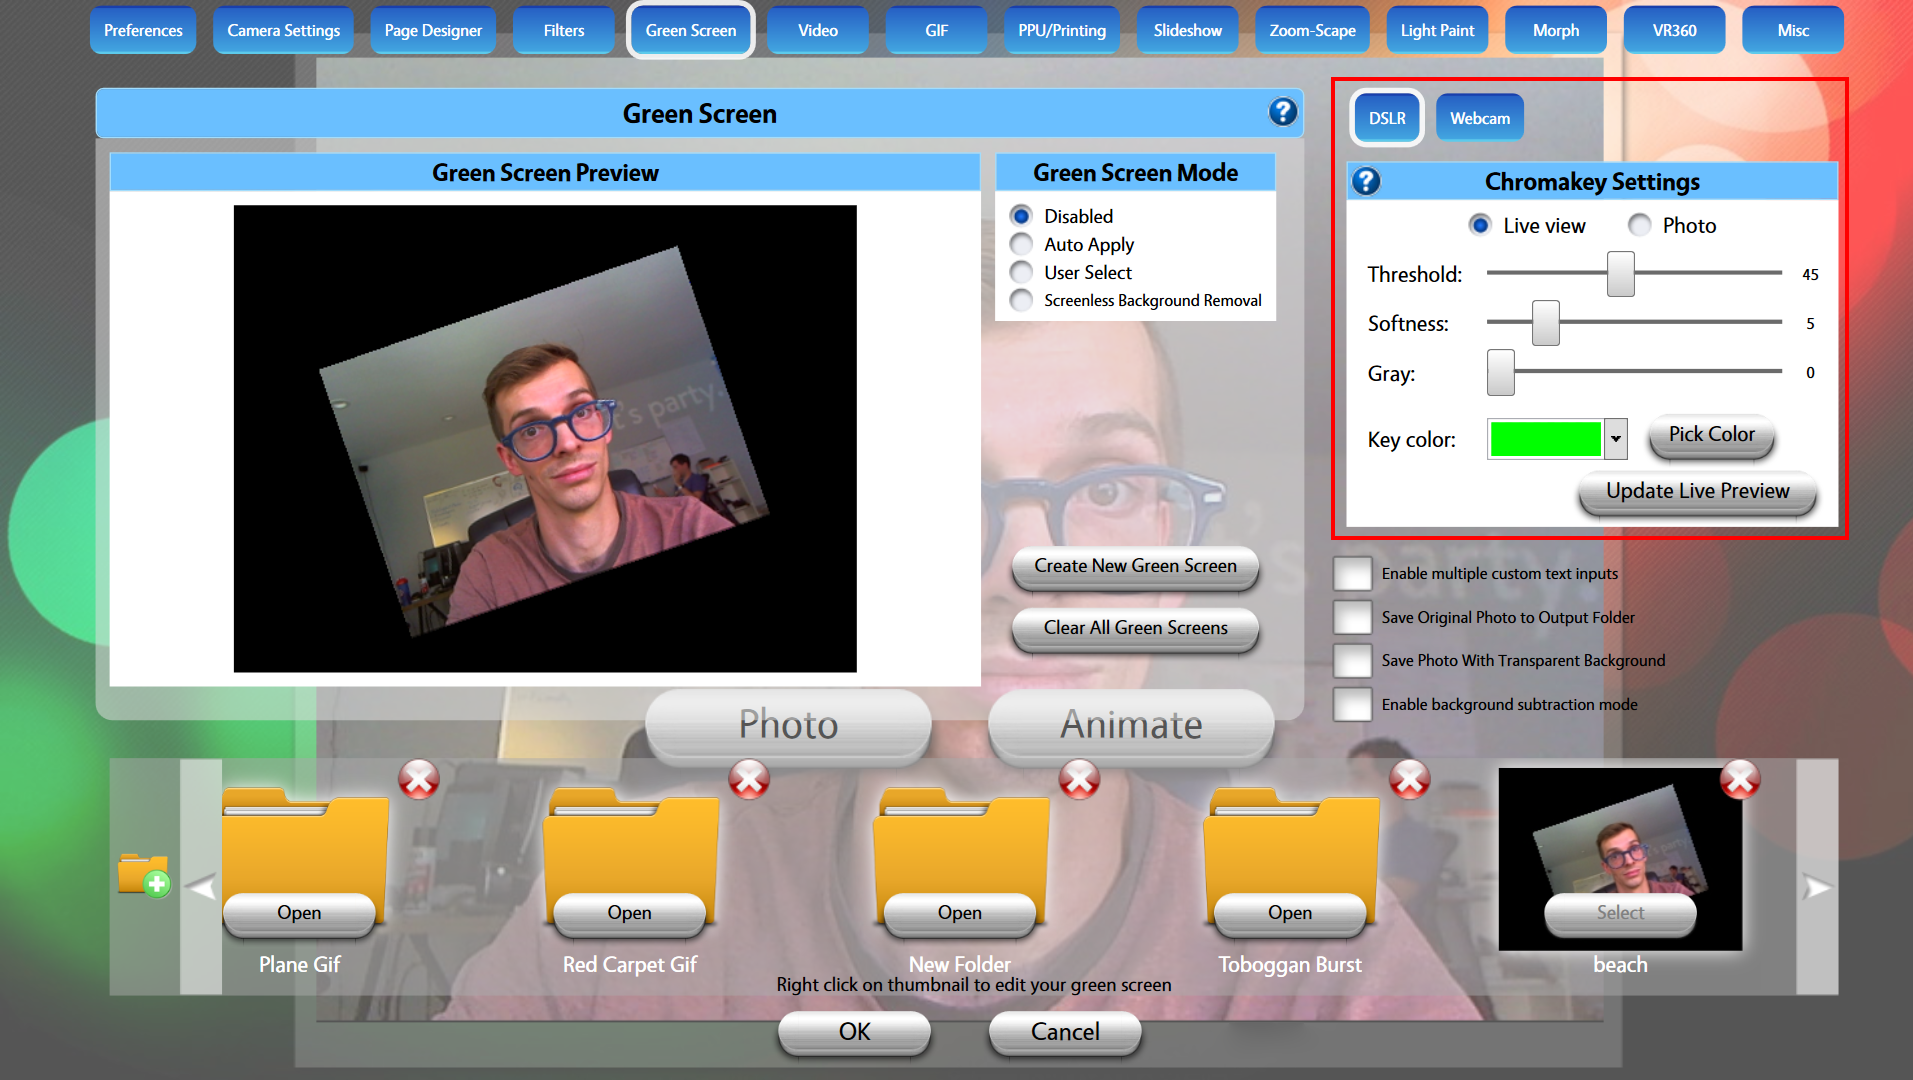
Threshold: Adjust to key out the visible green screen.
Softness: Adjust to apply softer or harder edges to your subject in relation to the background
Gray: Adjust the gray coloring of the subject
Key Color: Adjust to find the color that most resembled the green screen.
Pick Color: With threshold all the way to the left, use Pick Color to tap the area of your preview with your backdrop to lock in the exact color, then readjust the threshold value.
Update Preview: Select this option to update the preview with the current settings.
Please Note: The Chromakey settings in this window ONLY affect green screens used with photos, Page Designer, GIF, and Zoom-Scape.
Video, Morph, and VR360 have their own Chromakey settings in their respective tabs and edit windows.
Pro tip: We find the best color to use for Key color is "super green." Click the color next to Key color and then click the Advanced button at the bottom. You should see four sliders labeled R, G, B, and A:

Set R (Red) and B (Blue) to 0, and set G (Green) to 255. A (Alpha) should be left at 255.
Set your Threshold to around 45 and Softness to around 5. Remember to do this for both Live View and Photo!
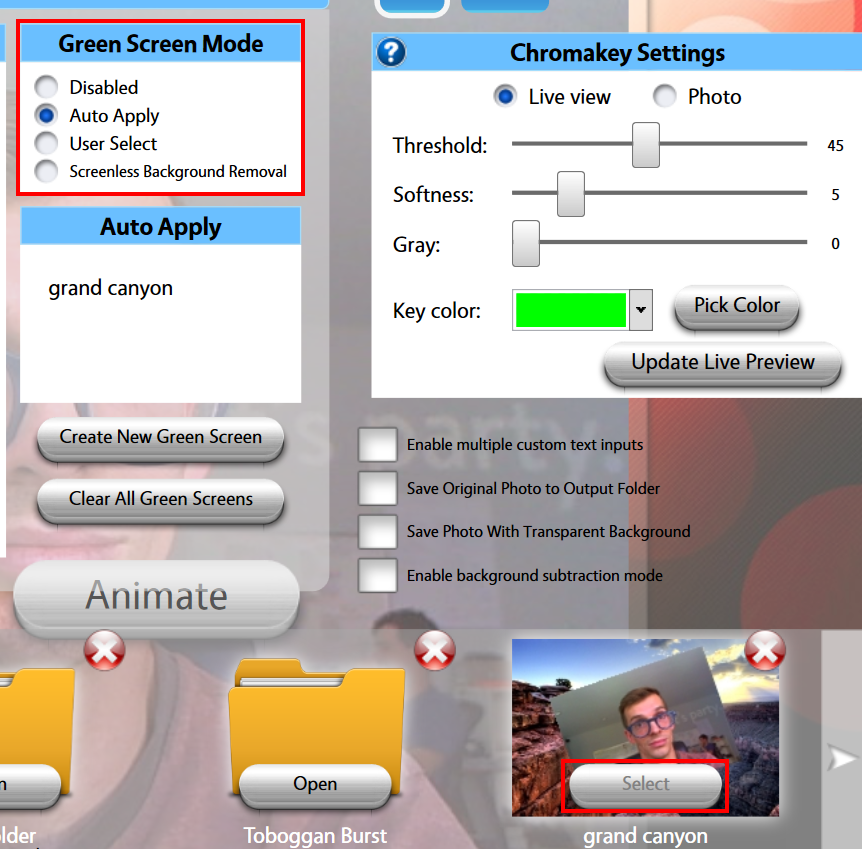
9.
In the box at the top of this screen labelled Green Screen Mode, make sure either Auto Apply or User Select are selected, and the green screen you created is selected by pressing the grey Select button located on the thumbnail of the green screen.
10.
Once the final adjustments have been made, click OK at the bottom of the screen and you'll be ready to take a photo using Green Screen!
Examples


Now consider yourself a pro with green screen activations!