Note: Generative AI prompts can be processed by either Stable Diffusion OR Gemini (NB) OR Gemini (Pro). Please see our guide HERE to understand the differences.
You may review our video and step by step guides below:
Step 1: Find the new AI Tab:
Step 2: In the AI Tab you’ll have our existing options to select from (you can tweak and play with them), or create your own AI options.
-You can create Gen AI or Face Swap options:

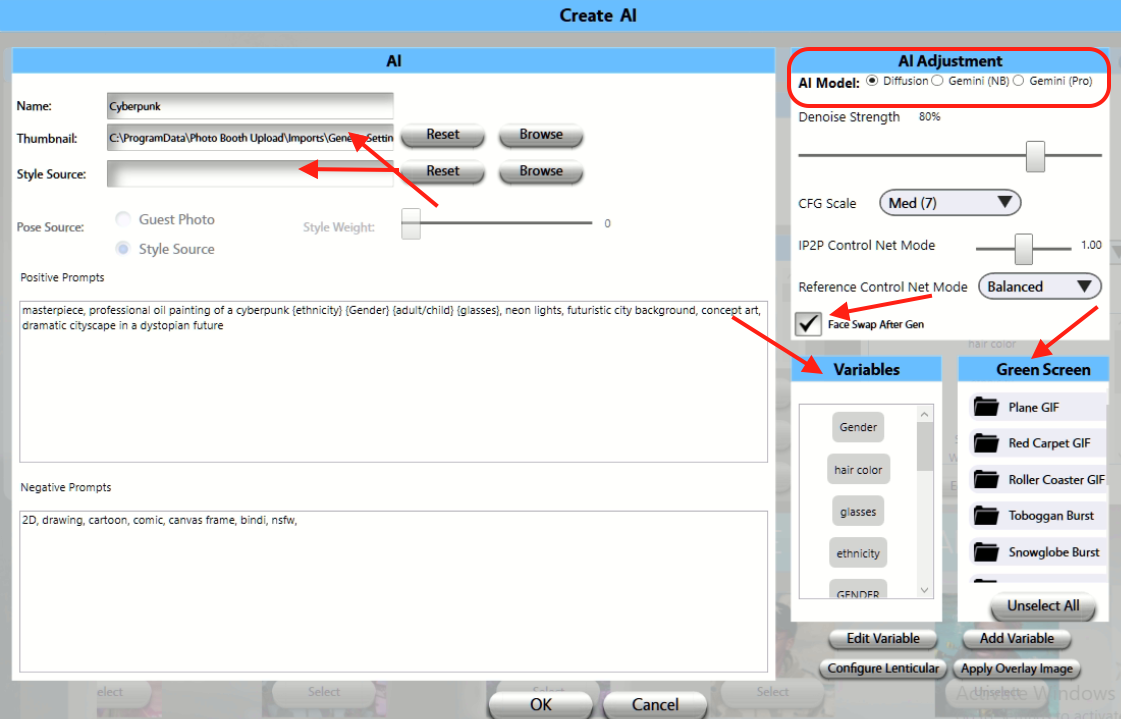
Step 2A: In the “Create Gen AI” Screen you can build your new Gen AI settings. Here are some things to be aware of:


- Thumbnail - Since there are no graphics being added at the start (they’re generated by the AI when you run it), there’s not anything to include in a thumbnail by default. So we added the option to load in an image to use - I suggest using one of your outputs once you are happy with it.
- Style Source - This is an image you can load that influences the AI rendering (optional). See our detailed guide HERE.
- Face Swap After Gen - This will do the normal generative AI then grab the guests face (or faces) from the photo and add them back in. It allows you to be much more aggressive with the prompt (higher denoise and other settings) and the photo will still look like the guests.
- AI Model - Choose between Diffusion, Gemini (NB) or Gemini (Pro). See the differences HERE.
- Variables - You can drag and drop these into your prompt. They will be shown inside “{}” (squigglies). These are different than putting words in parentheses “()” which adds weight to those words in the prompt.
- Green Screen - This will add the selected greenscreen setting to the image BEFORE it is sent to the AI system. These must be 512x512 Resolution (or will be cropped). If you want to add a logo or other overlay after the AI generation, the best place to do that is in your event settings on event manager (which helper will add to the images).
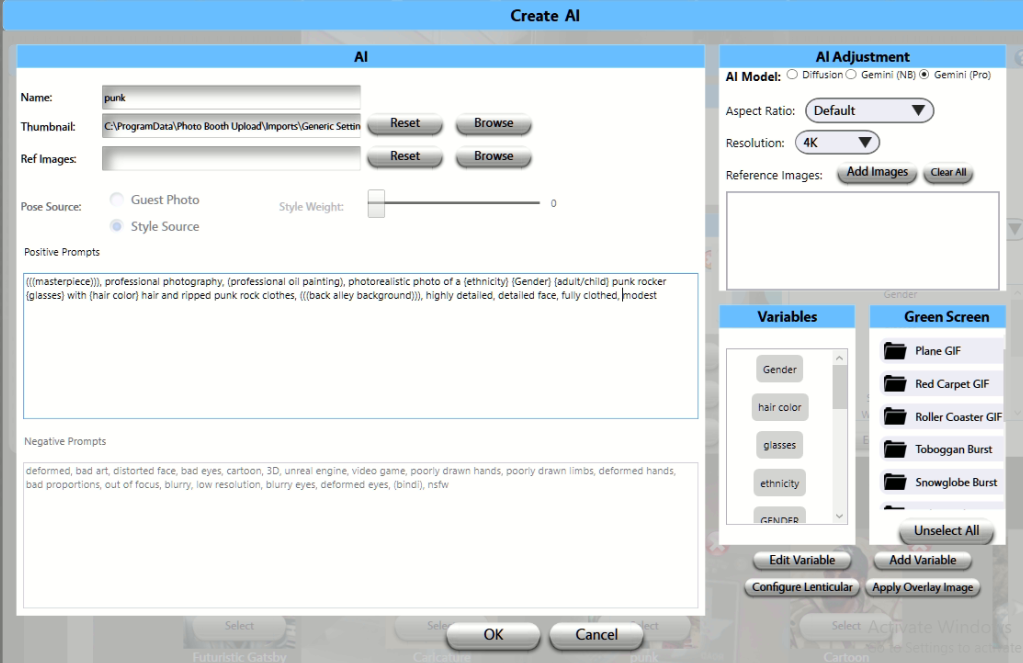
And below is a working example of our stock 'Punk' AI Filter:

AI Adjustment Settings explained (only if using Stable Diffusion):

You can view examples of how these options affect AI renderings HERE
Some more tips and notes on Gen AI:
Since the AI photo takes time to process, only the original photo will be shown on the PBU share screen. We recommend you turn off the share screen and share through kiosk (or the new gallery bar… See below).
A note on folders and file savings.
The original photos you take out of the camera will save to the originals folder.
The photos cropped to 512x512 and uploaded to the AI system (and with Green Screen on them, if it is enabled) will save to the processed subfolder of the originals folder.
The outputs coming back from the AI system will save to the output folder.
In the AI settings there is an option to save the processed photos to the output folder so guests can share before & after photos.
We’ve included a glasses variable in most prompts where users can select if they are wearing glasses. This is quite helpful in helping the AI with guests who are wearing glasses in their photos, but if you don’t have a lot of guests with glasses, you can delete the variable from your prompt so that users don’t have to answer the question each time
Sharing AI via the Gallery Bar and Kiosk:
There are multiple ways you can configure the AI tab to share both original and AI rendered images. These settings and their output are shown below:

- Save Cropped Photo to Output Folder will show the cropped (square) photo
- Save Original Photo to Output Folder will show the original photo from the camera, with no AI rendering
- Allow Share while Processing will show the thumbnail image with a yellow 'Processing' badge that guests can share immediately and then receive once processed
- Share Original and AI Image will send both the Original and AI renderings once the AI Image is processed
- Output Size allows you to choose between 512x512 or 720x720 renderings. Note that 512 will cost $0.25/render while 720 will cost $0.50/render
- No. of AI Images per Photo will you to choose up to 4 separate renders per photo captured using AI
Gallery Bar examples are below:


And on the Kiosk App:

Group Photos
When taking group pictures (with Generative filters) the results can vary since we are not able to adjust the variables for each person in the picture. See some examples below:
ORIGINAL

AI RESULTS


AI systems are more likely to cause errors or misgendering with group photos, but there are some things you can do to improve your outcomes. Some prompts will be fundamentally better for a wider range of people.
Examples:
- The "punk rock" prompt works really well for many combinations. Likely because there are a large variety of source images the ai was trained on for punk rock, men, women, couples, groups, etc. VS,
- The "Cowboy" prompt which does not work as well. We can still get some good results, but it is much more likely to turn a man & woman couple into both men, or a group into all men. Likely because the training data is much more weighted toward men (and that the word "cowboy" has "boy" in it, probably doesn't help).
Pro-tip: Use the variables feature to help define the guests. This is critical. For example, adding "Male & Female" and "Group" to options to cover all bases.


