Ever wonder what it would be like to look like someone else? Use our Morph feature to see your face change into the face of friends, celebrities, or even monsters! Follow along in the tutorial below to learn all about morphing between images.
Please Note: Some of the UI and features have been updated since the creation of this video. While all the features described remain functional, the UI may not appear exactly as presented.
Instructions start at 1:27
1.
Navigate to the Morph tab of PBU and click the button that says Make New Morphing.
2.
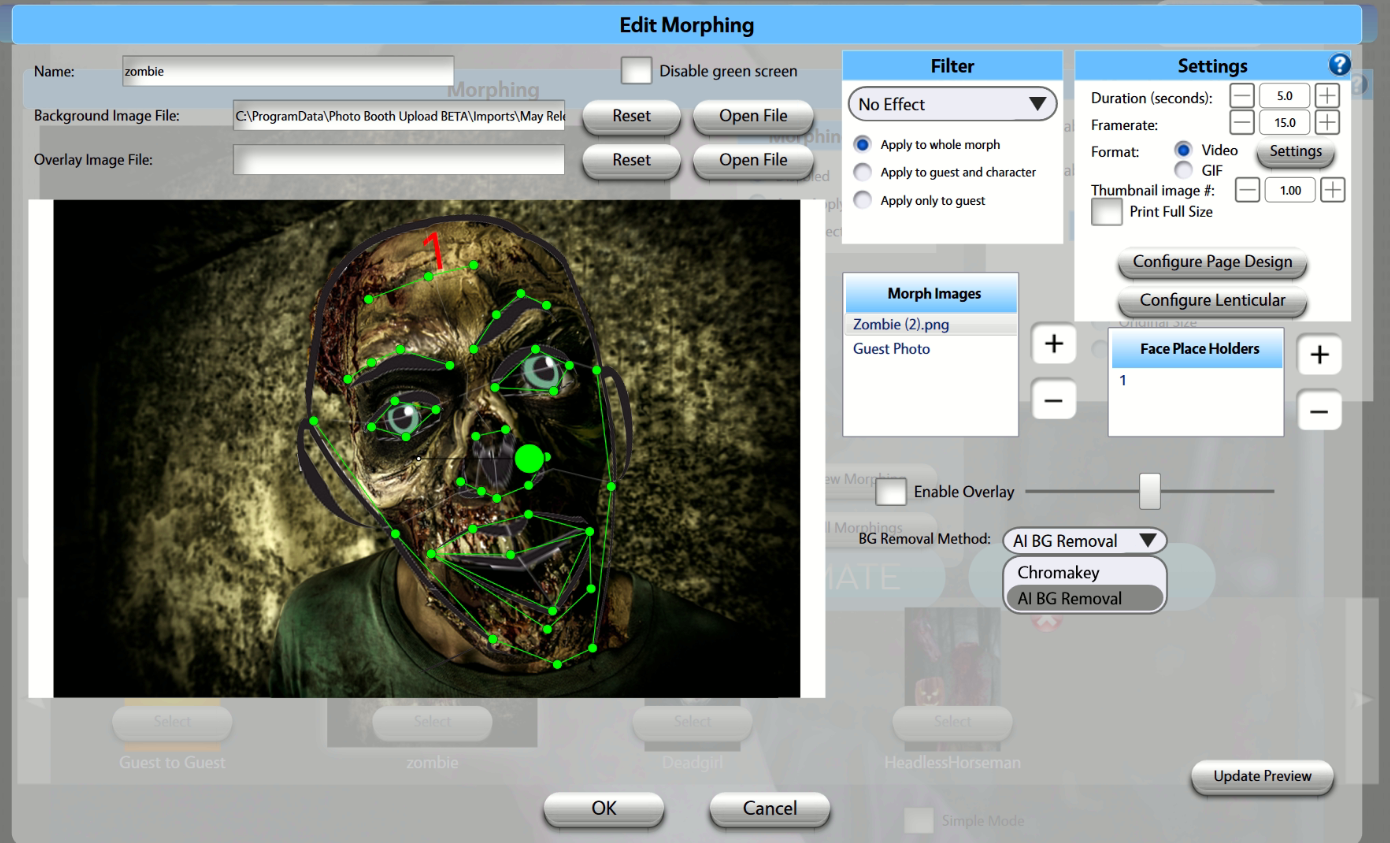
First, give your morph a Name.
Configuring Your Green Screen Settings
Chromakey
If you do not plan to use a green screen background, enable the Disable Green Screen option located at the top of the window. This will allow the activation to proceed without any green screen processing.
However, for the best morphing results, we strongly recommend using a green screen whenever possible. A properly configured green screen can significantly improve subject separation and create a cleaner, more professional final output.
If you will be using a green screen, upload your background and overlay assets before proceeding. Click Open File in the designated fields to upload:
- A JPEG background image
- A PNG overlay image
AI Background Removal
If a physical green screen is not available, you can enable the AI Background Removal option. This feature automatically removes the background from photos using artificial intelligence, allowing you to remove your background without a green screen setup.
Please note that enabling AI Background Removal incurs an additional charge of $0.15 per activation.
Notes: If green screen is disabled, set your Output size to 1800x1200 for a 6x4 print. You'll most likely output as a video, and that size can be set in the main Morph tab under Output Size on the right.
3.
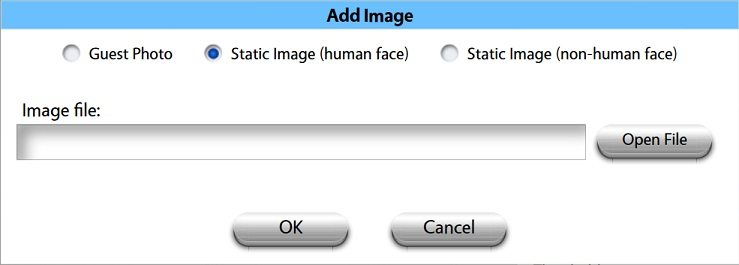
Determine the types of images that will be morphing together by selecting the + sign to the right of the Morph Images box. Your options are Guest Photo, Static Image (human face), and Static Image (non-human face). You'll need at least 1 guest photo and 1 more of your choice. The order in which you add these is the order in which the Morph will occur. So if you want to see the guest photo first, then morph into the face you imported, select Guest Photo first, click OK, hit the + symbol again, then select Static Image (human or not) and import your file.
4.
You have to add a Face Place Holder to tell the guest where to put their face when taking the picture. It's best practice to align the Face Place Holder to the face on the static image (if you have one), and move the guest photo around to match it.
Under Morph Images, select the static image (if you have one), so you can see it when resizing the face place holder. Click the + symbol to the right of the box that says Face Place Holders to add one:

Click and drag the green circle on the holder to resize and rotate it. Click and drag the holder itself to reposition it so it lines up with your static face:

For morphs between two guests, or between a guest and a static image, only one placeholder is required. The guest placeholder should be used as the source image for the morph. If multiple guests want to participate in the morph at the same time, you'll need to set up an additional placeholder for each guest. The target image must also contain the same number of faces so that each guest can be matched correctly during the morphing process.
5.
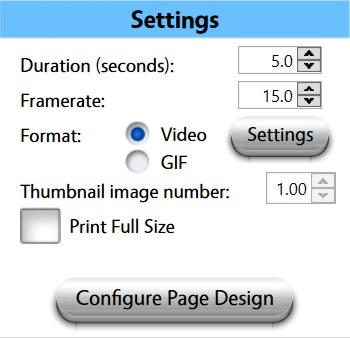
Determine the duration and frame rate in the top right-hand corner. You also have the options to adjust the thumbnail, if you want to print full size, and configure morph with page design.
If your Format is set to Video, click the Settings button to adjust the number of loops in the video and to add an optional audio track.
If you set the Thumbnail image number to 1.5, the thumbnail or print will be the halfway mark between the two images. If you set it to 1.25, it will display the first quarter of the morph between images. You can set the fraction to any number to the hundredth decimal place!
Configure Page Design will allow you to save parts of your morph as still images in a Page Design.
6.
Once you are done configuring your Morph, click OK at the bottom.
7.
In the main Morph tab, choose Auto Apply in the Morphing Mode box, then press the Select button on the thumbnail of your morph at the bottom of the screen. As mentioned in step 2, make sure you set the video size in this screen as well. Click OK and start making your morph!
Examples
Check out the links below for some examples!
Congrats! You're now prepared for mighty MORPHING!